Painting a room could be really easy, if certain conditions exist. For example if the room is empty and has ample natural sunlight so you can see exactly where you're painting. Our kitchen, dining room, and living room were far from empty and Mother Nature decided to play hide-and-go-seek with the sunlight last weekend as we painted. That made for a few interesting moments where we would move around lamps and try to figure out if a particular area was wet, missed, or just a shadow playing tricks on us.
First on Saturday (Day22) we were able to prep the space. I've been hearing so many raves about Frog Tape lately that I convinced the hubs we should give it a whirl. I'm happy to report we were both incredibly pleased and our cabinets were spared any paint residue. Usually when we paint we avoid tape because we're still scarred from this incident - the blue room paint peel. We have a routine where I cut-in with a brush and small roller and the hubs follows with a big roller.
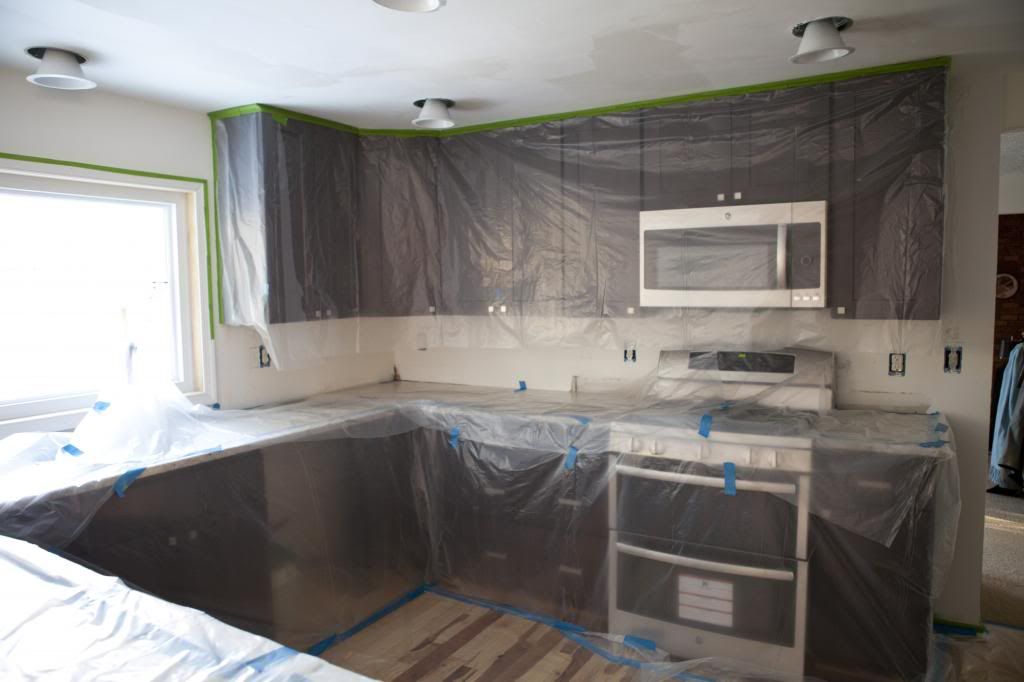
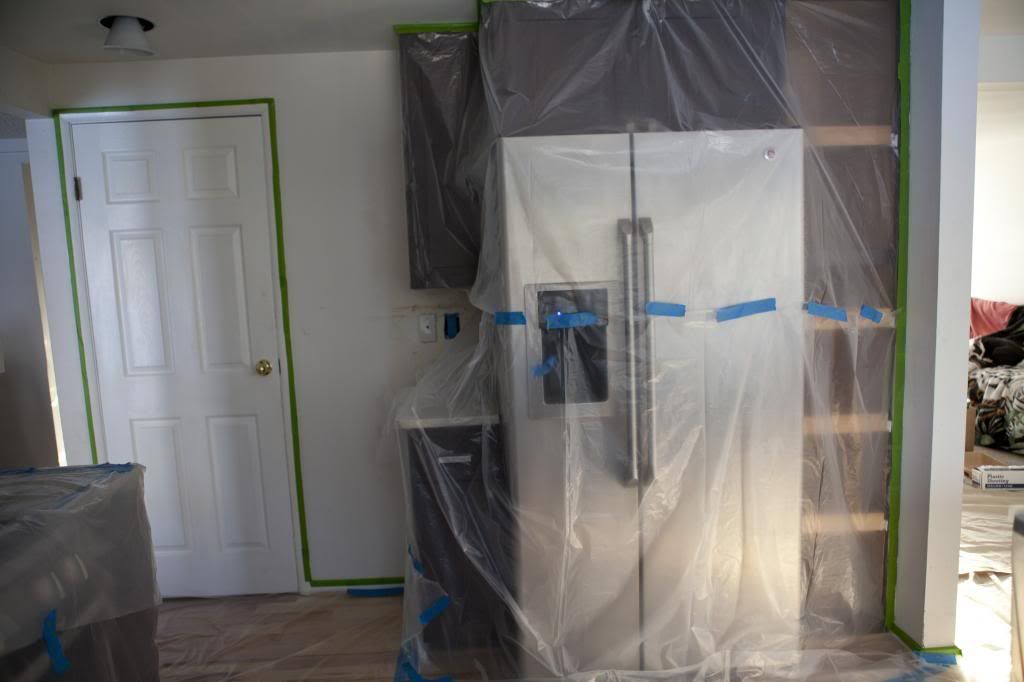
However, this time we had so many small areas in our kitchen that we had to mix things up a notch. We also didn't want to risk damaging our new cabinets, granite countertops, stainless steel appliances, or hickory flooring. The hubs picked out a whole lot of plastic sheeting and we covered everything that was new in the area. This actually took a lot longer than anticipated because we had to make sure to have everything nice and sealed, plus have straight lines where we needed them. Yes, I totally fell down just walking across the floor because it was so slippery.
We used the Olympic ICON flat ceiling paint in the kitchen and dining room. It's no VOC and had a slightly sticky application. I really liked it because it went on really smooth and stuck to all the new drywall. At first I was skeptical of the stickiness, but it really grabbed hold to the ceiling and went on very smooth. We only put one coat up on the ceiling and I think we have a few touch up areas needed because it was harder to see if something was wet or a shadow when we were finishing up. We like to keep our ceilings straight white so there wasn't any need to get a tint-able version of this paint.
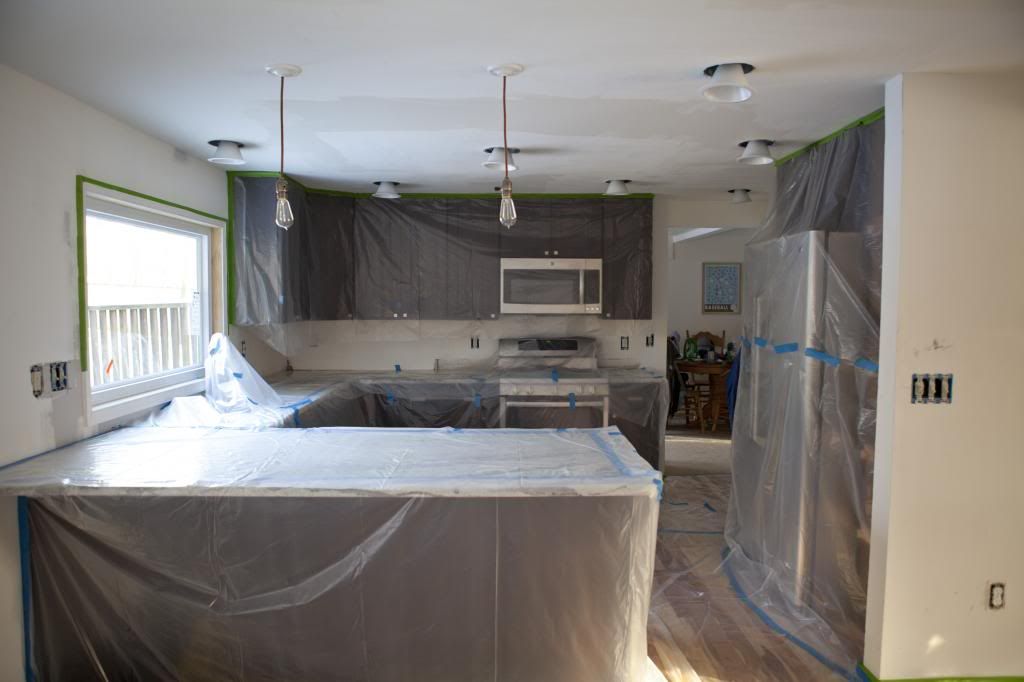
I told the hubs our kitchen looked like it was part of a scene from Dexter. He didn't get the reference.
Then, I mentioned something from Breaking Bad. Again, nothing!
Finally, he got what I was going for and said, "It looks like Huck brought his tool chest over." Yes! He made a Scandal reference! Love that man.

In the interest of saving time we opted not to paint the ceiling in the living room. There was just too much stuff in there to work around. Plus, there is a beam separating the living room from the dining room so we don't care if the two rooms don't have the exact same shade of paint. Because this paint was so such a low splatter formulation we might paint the ceiling in here right before we install the hardwood floors. At that point we won't care if a little bit of paint falls on the carpet. Oh, floors have been ordered and will be installed in just a few weeks. So excited!
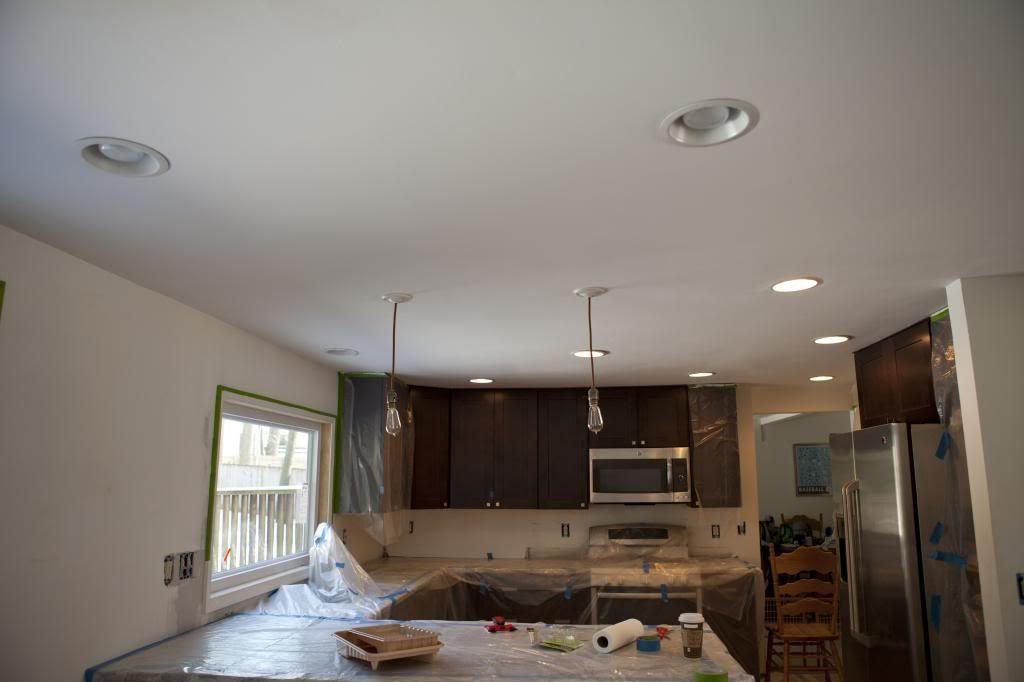
And we're done with the ceiling! As soon as the ceiling was done we started cutting down any of the plastic that we could just to make sure the Frog Tape held and we didn't have a ton of paint on our cabinets. Again, everything looked great.
Up next - adding a bit of color to our walls. We initially wanted to go with a very light gray color, but after seeing all the gray in the granite we were worried that would be too much, especially considering we have grayish marble tile going in soon (weather dependent!). Painting the ceiling is just awkward because it's a lot of overhead arm movements. Painting the walls just seemed never ending!
Beautiful kitchen. Can't wait to see the finished look :)
ReplyDeleteJessica
the way to my Hart
All of your hard work will pay off and it will be beautiful in the end!
ReplyDelete