Showing posts with label House projects. Show all posts

Monday, July 28, 2014

Patio Makeover: In Progress


Two things:
  1. This patio makeover is taking FOREVER. The hubs and I thought this would be a two weekend job - three at the most. Um, no. We just gave it our fifth weekend. Although we haven't given it full weekends every weekend if that makes sense. 
  2. This patio makeover is almost DONE. Which is fantastic because I have more cuts, bruises, and bug bites on various limbs than I care to admit or contain. 


This past weekend the hubs and I banged out the last remaining pieces of the patio 
- finished the natural stone trim;
- finished removing the previous deck's anchor to the house;
- replaced the vinyl siding under our patio door and where the previous deck was attached to the house;
- re-drained our sub-pump. Oh that was a fun find. That was one of those things we couldn't figure out about our house, but never went looking for the answer, "where does our sub-pump drain?" Turns out the drain was under our old deck and it was badly designed and clogged. Awesome. We just had the sub-pump motor replaced a few months ago and we'd like to keep this new one around for a bit so this was pretty important. Thankfully the hubs is licensed to design drainage systems so this worked out nicely for us. We went above and beyond what was needed, but the drainage field is now the basis for a rock garden. 
- made a last minute decision to add formal edging to our patio. Definitely turned out to be one of the better decisions we've made thus far. 
- power washed our house and our uncovered concrete steps. The steps need another round with the power washer and then the hubs is going to fix a cracked step.

All we have left is to add locking stand and fix a few loose pavers. We just need mother nature to cooperate and give us a few days of clear skies so we can get this done after work. Of course I say what we need to do and make the assumption it's going to be easy, but if this process has told us anything is that it will be tedious, time consuming, and back breaking. 


Monday, July 14, 2014

Patio Makeover: Demolition


When house hunting back in 2011 one of the things at the top of our list was a decent sized fenced in yard for the dogs. There's nothing better than letting the dogs run around in the morning while still in your PJs rather than have to fumble with a leash and walk the dogs in the morning. Especially when they can operate on different schedules if you know what I mean. 

Our yard was one of the things that sold us on our house. We're just a smidge under a third of an acre and while that sounds tiny it was the biggest yard we saw. It has a lovely 6 foot high fence and even more trees to provide a greater sense of privacy. 

However, when we closed on our house the back looked like this: 

Not pretty and even more importantly not safe. The hubs was convinced that our low deck wasn't "up to code" or structurally sound. The joys of buying a "as-is foreclosed home." We actually realized that there weren't any concrete footers for our deck and while our sandy backyard might have provided a soft landing in case the deck collapsed we weren't thrilled at that prospect. 

Finally, now that the kitchen is done we can start to tackle a few other projects around the house. Our first target was the back patio: out goes the unsafe deck and in goes a new 15' by 45' stone patio. No concrete footers needed.  

Operation Demolition was a go! 
We actually salvaged the brick landing area to the side of our deck (we think there used to be a hot tub there) and most of the deck surface wood. We're re-using the brick as trim pieces in the new patio and we're hoping to make outdoor furniture and a bar out of our old cedar deck. But sometimes a piece couldn't be salvaged and that's when the ax came in handy. 

One of the reasons we decided to go with a patio rather than rebuild the deck is because there were existing concrete steps leading down from our patio door that were previously covered up by the deck. The stairs appear to be in good order and the hubs is going to pretty them up good as new. 


We actually found that there was a 2"by 4" running the length of our deck, plus six feet or so in each direction acting as a footer. The wood was just buried in the sand and that was the structural support for our deck. Not awesome.  Would you want your deck support to be rotted like this guy? I don't think so. 

Here's our final outline of the new patio area. We're keeping the patio area on half of the house and extending it much further. The reason for this is the other side of our house has a steeper slope and we don't really want to deal with that level of grading at this point in time. We could easily add onto the patio and relocate our AC unit when that gets replaced down the road. We'll take on those issues as they arise. 


We finished the demo in one weekend (thanks to our brothers!) and the new patio is going in slowly. Mainly because:
- there are 147 concrete pavers to place and they weigh nearly 40lbs each. That's in addition to all the natural blue stone we purchased and the bricks. We purchased 5 tons of stones and that's a lot to move around. 
- it's been ridiculously hot out
- the World Cup has eaten up a bit of our "free time." 

Hopefully we'll be done with the main parts of the renovation this weekend and then we can get onto my favorite part - building the bar! 


Tuesday, July 9, 2013

Updating with Concrete Patio Stones

A few weeks ago during a routine trip to Lowe's the hubs made a beeline for the hard-scaping section when I was picking out flowers.  Sometimes it's rather dangerous to head into any home improvement store because what begins as "just a few things" quickly escalates into a new project.  It turns out the hubs thought we could update our rather narrow driveway and the weird walkway in our side yard for a few hundred bucks. 

I thought he was kidding, but sure enough he was spot on! 

Now, if only I wish he didn't pick the hottest weekend of the year to tackle a project that entailed moving nearly 2,000 pounds of stone. 


Narrow drive before and narrow driveway with stone path after. 


Weird side yard area before.  It looks like there used to be some type of stone walkway here connecting our carport to the backyard, but it was missing more than it had which meant it wasn't doing much for either of us.

Tools: shovel, broom, 10x10 inch tamper, rubber mallet, level

Materials: 50 of these Allen + Roth concrete patio stones from Lowe's 

Total Cost: $250

Step 1:  Purchase your materials/ get them to your house. I know that seems rather basic, but the hubs and I wanted to pick out the patio stones in case any were cracked at the store.  That mean we had to take two trips back and forth with both of our cars because we didn't want to over burden anyone's car. Thank goodness we live ridiculously close to a Lowe's.  This also meant that the hubs and I got serious side-eye looks from people when we were pushing thousand pound blocks of stone through the store.  

Dear old man who refused to step-aside in the aisle - thanks! Starting and stopping that car easily burned an extra 100 calories! 

Step 2: Dig out your trench/path for the stones.  We had to dig for our driveway because we wanted to the patio stones to be somewhat flush with our driveway.  For the side walkway we just laid the stones on the ground because we plan on building up the area.

I'm of the mindset it's easier to start smaller than you think you need and then dig bigger if needed. I've also got to give the hubs a round of applause because once we put one stone down as a reference point for sizing on the driveway he dug a small trench that was spot on. Man is a machine when it comes to dimensions!

Step 3:  Use a tamper and go crazy! Be careful because if that thing bounces off of the ground and smacks your klutzy-self leg it's going to hurt. 


A very nice neighbor saw us outside and brought over his wagon to make our job even easier! Score! 

Step 4: Lay some stones! Don't worry about being level at first, just get the general fit down. The hubs thought I was crazy because I didn't want too many of the seams to match up on the stones.  When everything was done and final he commented that I was right (victory is mine!). 

Step 5: Remove stones 1 to 2 at a time and continue to level them either packing in more dirt or smashing things down more with the tamper. We used a level here to make sure we were somewhat even with our driveway. 


Step 6: Surround the stones with dirt or some type of locking sand. We didn't purchase locking sand because our yard is very sandy. If we find our sand isn't cutting it then we'll purchase locking sand and brush that over the stones.  I brushed dry sand over the stones and made sure to get as much of the sand packed down into the crevices as possible.  The hubs then took a hose and lightly sprayed the entire area to pack the sand down even more and I went back over everything again with the broom. 

Step 7: Enjoy your new walkway! 


Side walkway area still needs work, but this is much better than the mud pit it used to be! 


We only broke 1 stone during the entire project, which is pretty amazing. Again, I'm so thankful to be married to an engineer because the hubs did all of his calculations and we had the exact number of stones we needed and didn't have to run out and get more.  

I didn't take a picture of every step because there came a point where I was absolutely disgusting and I didn't want to trek back inside to retrieve my camera or even touch it! 


I know this is the most ground-breaking (total pun) update to our house, but it's subtle and we love it. We're actually using these patio stones as a test run to see how they hold up in our sandy yard.  If they survive a few years, then the goal is to redo our backyard, tear down our back deck, utilize patio stones. If we don't have to bring in a ton of additional base sand that will really make this a more cost-reasonable approach. 


Wednesday, July 25, 2012

Dear Mike Holmes: We're above code!

Back in April 2011 when the hubs and I had our mellow yellow house inspected prior to purchasing the little fixer-upper we were told that the roof would need to be replaced within 3-5 years. Not the greatest news, but our little foreclosure was still priced $80k less than other houses in the neighborhood and our house had an addition and much larger yard.  We weren't going to give up the house because it needed a new roof.  Or a full kitchen remodel and two bathroom remodels. Oh wait, make that two full bath and one half bath remodels.  It's not like we're counting or anything! 

If you asked me, the gameplan was  to buy the house, continue saving like crazy, and renovate the kitchen within the first two years of living in the house.  In my mind that made sense since every system in our house, except for the roof, came with a two-year warranty because it was a Freddie Mac foreclosure.  

The hubs, the structural engineer in the family, had other plans.  Dude became an HGTV addict after we bought the house and it was only natural that he became a fan of Holmes Inspection.  I swear to goodness if I hear, "we need to be above code" one more time I'm going to go up to Canada and give Mike Holmes a piece of my mind. 


This is what the roof of our house used to look like.  Yes, we were growing a small vegetable garden in our gutters.  That was our take on a roof top garden! The hubs made a pitch for putting gutter guards up on the gutters.  I gotta give him some credit because that sounded like a good idea in my book.


One side of our house used to be tree lined with some weird looking really skinny pine trees.  They were super tall and skinny, but not cedar trees.  I don't know, that's all I got. I didn't even have time to take pictures of them when the hubs cut them down and got rid of them.  It would appear that those trees were a bit too close to the house and would knock into the side of the house from time to time.  And by from time to time I mean all the darn time it seems.  There were a million tiny little holes and cracks on the one side of the house.  I'll be completely honest, I totally forgot about this defect because I never go on that side of the house! Out of sight, out of mind! 


We also had two lovely satellite dishes on our roof when we moved in.  The hubs called both DirecTV and Dish Network and was told by both companies that the dishes belonged to the house and we had to remove them ourselves.  Guess who didn't go on the roof and play with either dish - that's right, this chick!

One Friday in mid-May the hubs took the day off from work and had three separate roofing companies come to the house and give us quotes on a new roof.  Or at least that's what I thought was going on.  He called me a few days later when the quotes were in and told me, "okay, the one company I liked the best said it's going to be $12k to do everything."

Um, WHAT?!?!?!?!  I thought we were just getting a new roof.

Hubs: "That's for everything - the roof, a new ventilation system, additional insulation in the attic, new siding on the side of the house that will be custom color matched, and new gutter guards."

Truth be told, I kind of forgot about those "other things."  You know, the ones that comprised of 40% of the total cost of the project.

Well there went any fantasies I had about custom Knotty Alder kitchen cabinets in the near future.

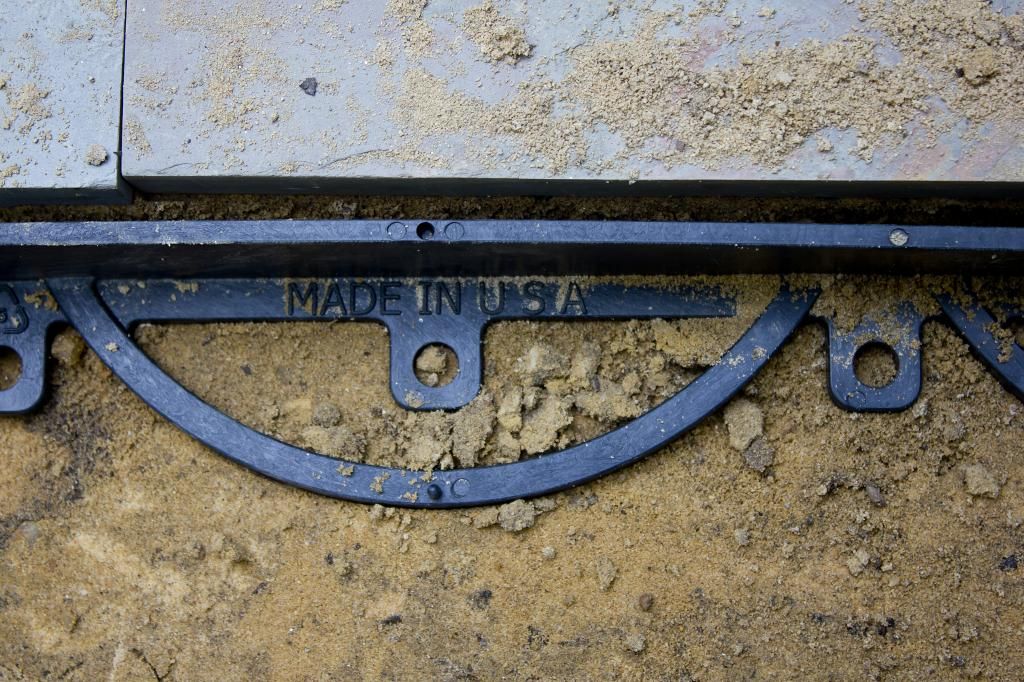
Fine, sign on the dotted line and let's do this already! I told the hubs, "you better make sure that every single thing that goes in our house is environmentally friendly and made in the USA."  Dude knows me and immediately countered, "Shingles are 50 year grade, top of the line, and made in Hagerstown, MD.  Insulation is 85% recycled paper product and produced in Laurel, MD."

Supporting local business ... sign me up!

Thankfully, I was out of town when most of the work was done on the house so I didn't have to physically face any of the materials or workers and think ill thoughts about how much money they were costing me.

 Some of the materials. 


New shingles and new protective coating for the chimney.  Fine, it's black and shiny which means I like it. 


New roof and new gutter guards.  I'm actually really a fan of the gutter guards because now I don't have to worry about the hubs dangling off the side of the house in an attempt to clean the gutters.  One less way he can die doing home maintenance is off the list! 


Brand new siding on one side of the house.  Perfectly matches the rest of the house. 

I'm sure there are more technical terms for this, but they also re-hung our downspout and fixed the craziness that was going on around our meter. 


Voila! New roof!  No more ugly and broken satellite dishes!  And, the hubs wasn't harmed in any of the home repairs! Three cheers all around! 


Siding - $2350 
Gutter Guards - $1500
Roof - $6487 
Attic Insulation - $1134
TOTAL: $11,471

The roof actually came in under budget because zero of our wood support beams had to be replaced.  Honestly, with how old some of the other systems are in our house the hubs and I were shocked that there wasn't some type of water damage in the attic. Don't get me wrong, none was found during our inspection and we're thrilled, but we're just pleasantly surprised.  The old shingles were chipped, frayed, and well past their shelf life.  We're actually hopeful that the new attic insulation will pay for itself over the next few years based on lower heating and cooling costs. 

There were a ton of deals involved like $2k discount for leaving a sign in our yard for two weeks, discounts for combining services, scheduling in advance, etc. I know I gave the hubs a hard time about adding on everything now rather than doing it later, but I will say he was right.  The Baltimore area was hit with a massive heatwave right after our new roof was put on and it was actually so cool in our house that we had to turn our AC down.  Our master bedroom used to get a tad warm at night and it's been much cooler since we've had the additional layer of insulation and the new roof put on.  

I gotta give a bit of credit where credit is due: hubs you were right. It's better to be above code! 


If anyone in the Baltimore/DC area needs a new roof, insulation, gutter guards, or siding I can definitely provide a positive recommendation for a company.  Just let me know. 

The hubs and I did not receive a discount for blogging about our experience.