Friday, February 28, 2014

Oreo and Thin Mint Cheesecakes


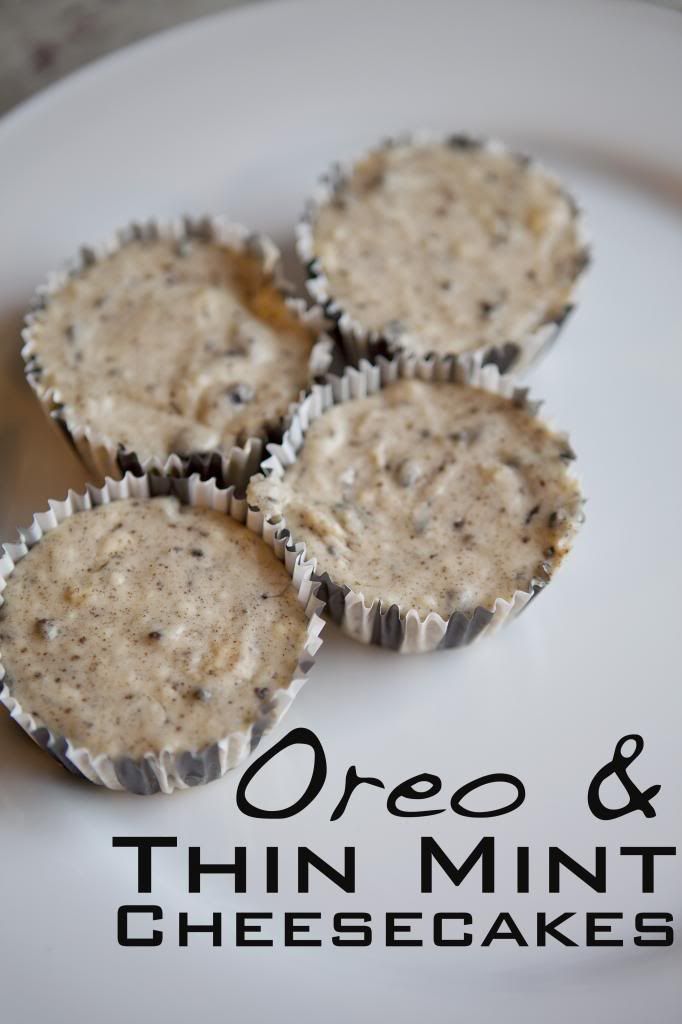
I specifically left off the 'S' on 'Thin Mints' above because I feel like unless you're eating the entire box you should just keep it to singular cookie form. No judgement here. 

This recipe came about by mere accident. I planned on making Oreo cheesecake cupcakes using the Martha Stewart recipe I've used before (seen here). However, the particular package of Oreos the hubs purchased only included 36 individual cookies, which means the package has been significantly decreased from the 42 needed to fulfill this recipe. Not to let things go to waste I did something a little crazy and it worked beautifully.  
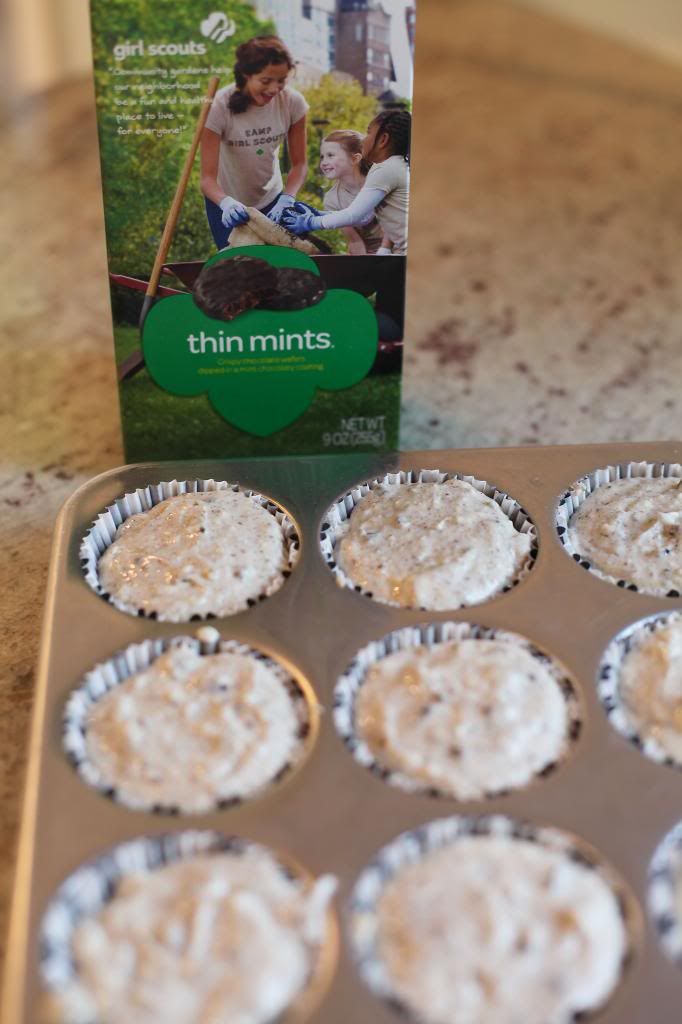
Enter Thin Mints*

I took my emergency stash of Thin Mints and substituted one tube (you know - half the box!) of those minty goodies for half of the Oreos needed to make these cheesecakes. Problem solved! And I got to eat the rest of the Oreos! 

Ingredients: yields 30 standard cupcakes or individualized cheesecakes if that's the term you prefer.

  • 15 whole Oreo cookies and an additional 6-8 crushed Oreos (add more crushed Oreos if you want bigger cupcakes and more cookie bites)
  • 15 whole Thin Mint Cookies and whatever Thin Mints are left in the tower of goodness (you know how Thin Mints come wrapped in two plastic wraps in the box. Just one one wrapped half of the box.) Am I the only one who remembers these boxes holding more cookies as a child?
  • 2lbs cream cheese, room temperature (don't get low fat! It's too runny.)
  • 1 cup sugar
  • 1 teaspoon pure vanilla extract
  • 4 large eggs, room temperature, lightly beaten
  • 1 cup sour cream

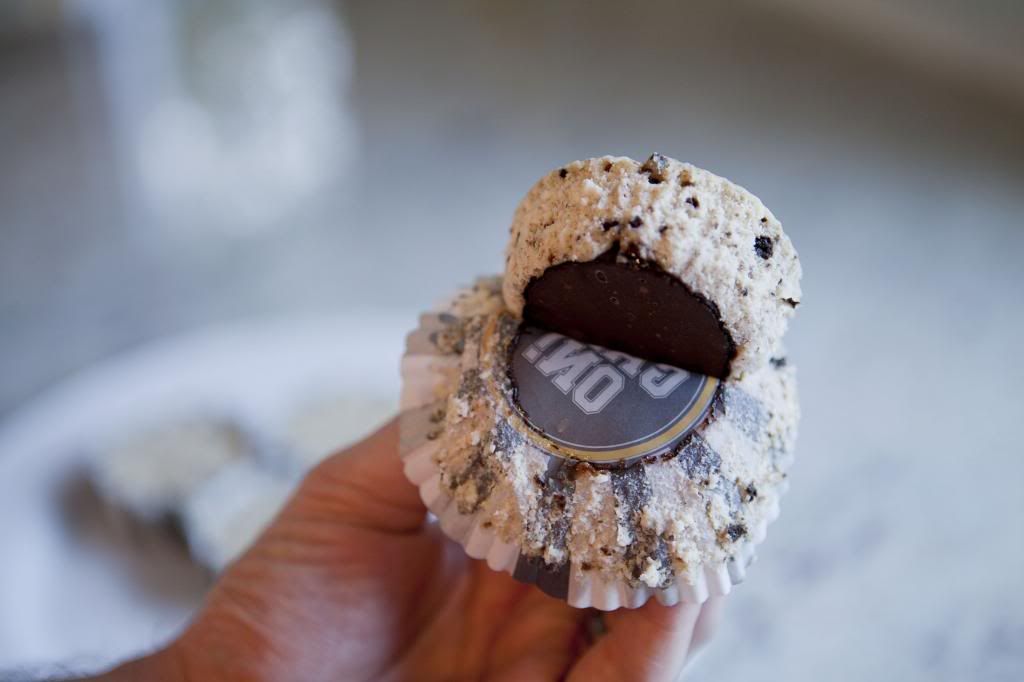
I made the batch two different ways - half with a Thin Mint lining each cup and half with an Oreo as a base.  Honestly, pick whichever cookie is your favorite and go with that, but you can't beat the combination of Oreos and Thin Mints. 


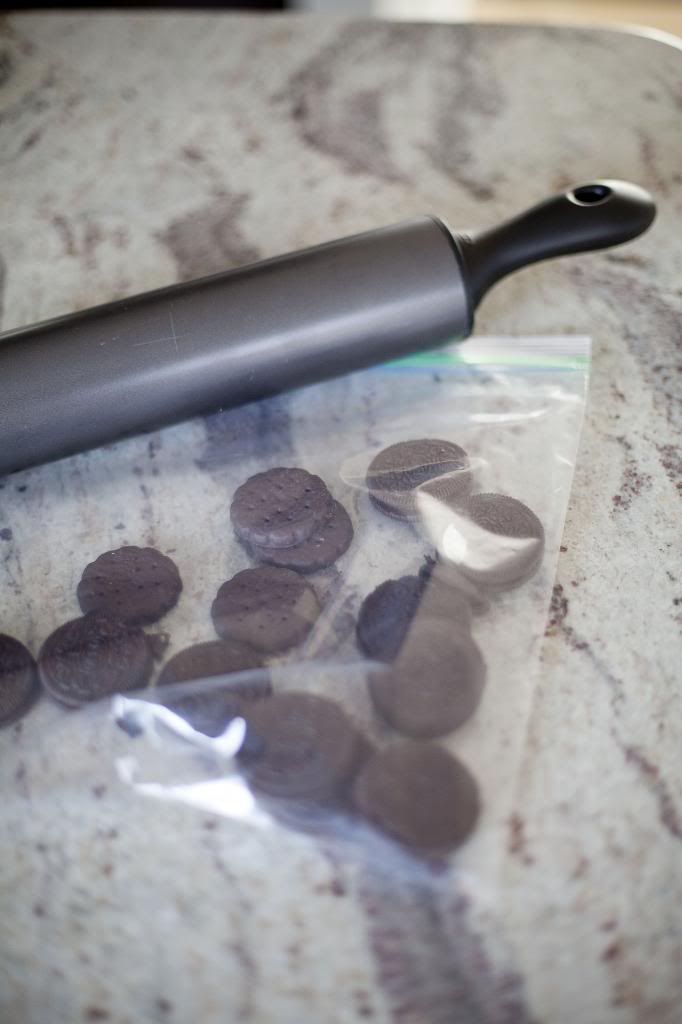
Again, just add a mix of Oreos and Thin Mints, crush accordingly and enjoy your cookies and cream.  My favorite method of crushing cookies is to throw them in a plastic bag and use a rolling pin to break them up. No mess, no fuss! 


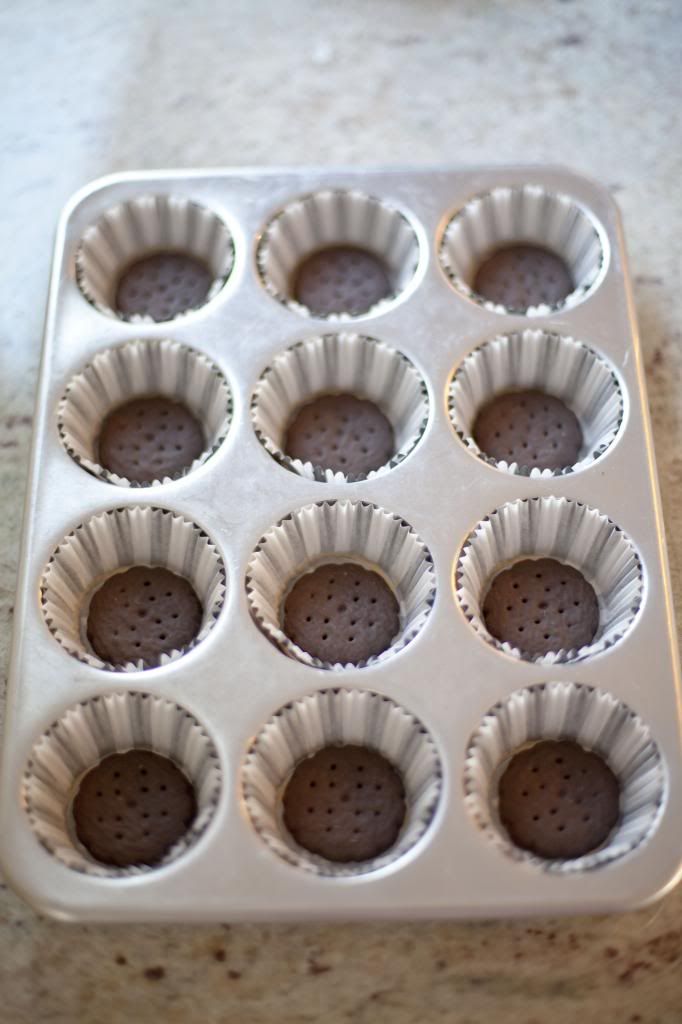
Preheat oven to 275 degrees. Prepare standard cupcake liners as seen above. Use an electric mixer on medium-high speed and mix cream cheese until smooth. Gradually add sugar and mix with cream cheese until combined. Mix in vanilla.  Slowly add eggs, approximately one at a time. Mix in sour cream.  

Stir in chopped cookies with a large spoon. Fill cupcake liners (these don't rise so ignore the standard "fill 3/4 way method") and bake for roughly 22 minutes. Transfer to wire rack to cool completely. 

Now, these hold their shape the best if you cool them while they are still in their cupcake pans. I'm very glad I now have enough cupcake pans to do this and the really do hold up better that way.  Remove from refrigerator just before serving.  Enjoy! 


Did you know that you can download an app to find your nearest Girl Scout cookie location? Or hit up a grocery store/religious center/mass transit hub. They got me at two out of three locations this year.  


So seriously, how many boxes of Girl Scout cookies do you have at the moment?  I'm going to let you in on a little secret - if you're in my house you better leave my Tagalongs alone because I will get red head crazy on you if you eat any of them.  Honestly, I buy at least one box of Tagalongs and Thin Mints every year that way I can say to the rest of the Girl Scouts when they hound me, "Oh, sorry, I've already purchased my boxes for this year."  


*This recipe is in no way, shape, or form sponsored or affiliated with the official Girl Scouts Cookie people. However, I was a Girl Scout for years and I approve these cookies. You're welcome! 

Wednesday, February 26, 2014

Tourist For A Day


I moved to the Baltimore area in 2007 and I'm ashamed to admit that up until this past weekend I had never visited the National Aquarium. I've been to the Zoo, a few museums, numerous concerts, and almost every supporting event this town has to offer, yet somehow I was missing out on Charm City's most well known attraction.

Thankfully, the weather was gorgeous this past weekend and the hubs and I took advantage of the unseasonably high temperatures to wander around the Inner Harbor and spent a few hours amazed inside the Aquarium.  The hubs read every sign, placard, and piece of information (besides the map - obviously!) and I was pleased to remind him that we have to use our reusable grocery bags in order to save the turtles.  It's so funny, but we failed through on previous plans to visit the Aquarium numerous times over the past seven years, but we're already planning a second trip back with friends and family.  I think we'll probably spend even more time in the Jelly Fish exhibit because while terrifying, they are dangerously beautiful.

Are there any major tourist attractions in your area that you've yet to experience?  We still haven't done a harbor cruise and I think we need to cross that item off of our proverbial "Baltimore To-Do" list sooner rather than later.

Monday, February 24, 2014

Kitchen Renovation: The Finished Kitchen

It took 33 days to go from Demo to Structurally finished in the kitchen. Then, naturally I took dragged out touching up the paint portion of the renovation. But thankfully this weekend the kitchen was ready for its photoshoot. Now, it's a hard room to photograph because of the amount of natural light it gets. I know, it's a horrible problem to have! That window over our sink might not look massive, but it's 57.5 inches wide and lets in a lot of light. Plus, our living room has nearly eight feet of windows that let afternoon light pour into the house. Again, we're not complaining! 

This post is all about photos. I'm going to keep my words to a minimum. If you have a question please leave a comment and I'll follow up with you.  Once we finish re-checking all of our receipts I plan on putting together a cost-by-cost list of what this renovation cost us, financially, in a post next week.  For now, I've listed every single material source I could think of at the bottom of the post. If you don't see something listed there I'll get back to you and add it to the list.  

Hard to tell, but each corner of our U-shaped kitchen is home to lovely Lazy Susan cabinets. I've never had one and now with two I don't know how I ever survived without them. 

My absolute favorite part of the new kitchen layout - being able to see the pups lounging in the living room. Although we need to get a carpet in there soon because Jewels is not liking the coolness of the hardwood floors! Jax is enjoying the momentary peace and quiet. 

Still on our proverbial to-do list: dining room furniture, barstools, window treatment, upgrade electrical outlets, sink mat (mainly so Jewels can have a fuzzy place to put her bum while we cook), floor registers, decorate, de-brass our basement door, etc.

But a big thank you to the whole blogisphere for the years of inspiration. I've been saving images of different kitchens before Pinterest ever came around. I've got a 3-ring binder full of clippings from every cabinet manufacturer out there. Plus more pages ripped out from every home design catalog and magazine available. This kitchen was a long time coming and it's a kitchen we plan on using and abusing for the next 30 years or so. Not everything might be someone else's cup of tea, but it's our perfect cup (dash of milk, no sugar!).


Sources: 
Design and Contractors: About Kitchens and More // Cabinets: Wolf Classic Cabinetry Dartmouth in Dark Sable (USA!) // Floors: Mohawk Natural Hickory (USA!) // Quater Round: Bellawood Hickory (USA!), purchased from Lumber Liquidators Paint: walls Sherwin-Williams 'Mountain Air' (USA!), ceiling Olympic Icon (USA!) // Backsplash: Meram Carrara Subway Tiles, The Tile Shop (installation materials are USA!) // Granite: River White, MS International // Pendant Lights: Rejuvenation (USA!) // Sink & Faucet: Eclipse Stainless // Window: custom American Craftsman (USA!), ordered from Home Depot // Garbage Disposal: InSinkErator (USA!) // Appliances: GE Profile Gas Range PGB950SERSS, GE Profile 
Dishwasher PDT750SSFSS (USA!), GE Profile Microwave PVM9215SFSS, all purchased from Lowe's // 

If you want to catch up on any of the related kitchen renovation posts they can all be found here.

Thursday, February 20, 2014

The Only Blazer You'll Ever Need


9 to 5 - Dress: Clover Canyon 'Twist Scarf' // Booties: Nanette Lepore 'Two-Timer Wedge' // Clutch: Clare Vivier 

Blazer: Helmut Lang HELMUT 'Slouchy Single-Button Suiting Jacket' 

5 to 9 - Blouse: The Icon Shirt By Rochelle Behrens //  Trousers: Eileen Fisher // Flats: Modern Vice Painted Snake Loafers // Bag: David Galan 'Large Shades Tote' 

I made a promise to myself last year on my 30th birthday - no more junk. No more poorly constructed clothes. No more t-shirts that cost less than a grande latte and shred after two washes. No more cheap jewelry pieces that potentially contains dangerous materials or turn my skin green. No more ill fitting garments that were "on sale."

Basically, if I didn't absolutely love something and feel confident about how it was made I wasn't going to buy it. Last year I bought five items of clothing/accessories that were imported. Two of them were nice pairs of shoes that were made in Italy and the other three were all made in England or Canada. I realized I was a bit stringent on myself last year in terms of what I purchased, but hey, I was saving up for a major kitchen renovation.

The flood gates aren't certainly opening this year in terms of what I can spend on clothes, so I still have to make my dollars count. Yet, I want to upgrade a few key pieces of my wardrobe that are starting to show the amount of wear and tear I put on them. First and foremost - a Helmut Lang blazer. I've been secreting eyeing them and this is the year I take the plunge. I tried one on once and it felt like magic on my skin. The greatest thing about the blazer I'm eyeing is that it works for all hours of the day. And that's what I'm willing to spend a pretty penny on - a blazer that I can throw on anything and instantly elevate my outfit to perfectly polished.  I consider a slouchy black blazer to be a wardrobe staple for my lifestyle.

What's your wardrobe staple? And would you splurge on it?

Tuesday, February 18, 2014

Living Room: Hardwood floor installation

Made in USA: Wood Floors: Mohawk Natural Hickory from Wood Floors Plus // Sofa: Z Gallerie Harrison Sofa // Pillows: Naked Decor // 

Confession time: I am a perpetual slacker when it comes to finishing a project. I mean well and I have the best of intentions, but finishing a household project is a challenge for me. Instead of doing the natural thing and finishing the kitchen over the long weekend the hubs and I decided to move to the next room and we ripped apart our living room.  Okay, so maybe our procrastinator tendencies aren't terrible, but the kitchen still isn't done and we've already cut ties with that room. (I kid, it's not finished because I'm too lazy to buy a new paint roller. Not like I didn't make multiple trips to Lowe's this weekend or anything.)  

We bought our Mohawk hickory floors from Wood Floors Plus. They were a slightly different model number than the floors we bought for the kitchen and dining room, but they look exactly the same. I'm really happy we bought them when we did because they are currently out of stock! This is a discontinued color so I'm really happy we got them when we did. Whew! 


So this is what our living room looked like pre-hardwood floors. These photos were taken during a snowstorm, so the lighting wasn't great.  We cleared out the room on Saturday morning, tied up the curtains, and then ripped up the carpet. I made darn sure to make certain our wireless router wasn't tossed or disturbed during this project because there was no way in heck I was risking my internet privileges! Priorities people. 


The room is 17 feet long so we decided to roll up the carpet and cut it into three separate rolls. That made the weight much easier to maneuver outside onto our porch. We have a Bagster for this project, but we didn't set it up since our front yard is a snow fort at the moment and temperatures are supposed to rise into the 50s this week. That's a recipe for disaster! Instead, we're going to be those neighbors with a bunch of junk on our front porch for a few days. I'm sure our neighbors love us! 


The hubs was in charge of dismantling our scary metal transition between the living room and foyer. Notice the awesome seam in our carpet? Gotta love the shoddy job that was put in by the Bank that owned our house. I guess I can't complain since our house did come with brand new carpet. 

And then there were carpet screws. Just like the wood floors there were too many to count. Unfortunately, these suckers could only be pried up with a pair of needle nosed pliers. Insert copious amounts of "this sucks" here. 

But then the snow went away and on Sunday we were able to install our Mohawk Hickory floors. I was home this time around and I got to help with everything, which may or may not have annoyed the hubs because I kept saying things like, "we need another pretty board here" or making too many Thor references.  I will say that I have bruises all over my body from carrying boards back and forth and kneeling all over the place. I will never make fun of anyone who wears knee pads again in my life. Ever. 


I also got kicked off of nail gun duty for laughing each and every time I "brought down the hammer." I think I made it through 4 rows of flooring when the hubs asked to switch with me. At least I got in a few licks on that sucker! 


There were no objections when I picked up a regular old hammer and finished off the last few rows of flooring the good old fashioned way.  I think we made up to four rows (well, really 3 and a half) away from the wall with the nail gun and then it was time to drill and hand nail. There just wasn't enough room to swing the mallet at that point. 


We stripped the boards for the last row down to 2.5 inches and that left us with a decent expansion gap all around. The crazy thing was that last row was perfectly even, which means this is the only straight wall in our house or we put down a very crooked floor :) 


It took a little bit of finesse to get the last row of boards in, but we did it! I don't know if I've ever breathed such a sigh of relief than when that last board was finally nailed down. 


Ugh, the worst part of any home improvement project is the cleanup. I am officially over sawdust.  And my hands are absolutely shredded. I couldn't grip anything with gloves so I skipped them and I don't think my hands are very happy with me at the moment. We cleaned up most of the mess and then we put down our quarter round. That was probably the easiest part of the floors! 


And finally, after purchasing 30 boxes of wood flooring to put in our kitchen, dining, and living rooms we're left with these few pieces. We had more damaged boards, but we quickly put them in the Bagster pile as soon as we discovered any type of damage.  I don't know what we're going to do with these few boards yet, but I made sure to put them in a safe place down in the basement.  


Now, we just have to finish this room! Easier said than done. The couch, entertainment center, lamp, curtains, pillows, wall color, and obviously the floors stay. The 8 year old Ikea chair, coffee table, and dog bed need to find a new home sooner rather than later.  We should probably get matching outlet covers and new floor registers, but those are relatively minor updates.

This is the spot where I ask for recommendations on getting a gallery wall started. That's a big couch, with a lot of wall space and it needs a lot of help! We have a city planner's map of Baltimore from 1872 that will be our main feature on the wall, but I just can't figure out what other types of frames to put with it. HELP!

Thursday, February 13, 2014

Neutrals with Python Print


Made in USA: Skirt: Eva Franco (next purchase) // T Shirt: Everlane // Blazer: Alex Lane (similar) // Watch: La Mer Collections // Nails: OPI "Man Repeller" // Lips: Revlon Balm Stain 

Imported/Unknown: Purse: old Kate Spade (similar, made in USA option) // Necklace: Lydell NYC (made in USA option) // Pumps: Delman (similar


I don't work in a creative field. There I said it. I'm not ashamed to admit it and I don't think it makes me any less of a creative person. I like the uniformity of numbers, they way they add up, the way they lead to an answer, and really I'm a problem solver at heart. My claim to fame at work was unearthing millions of dollars of federal funding that got "lost" in a report due to shoddy design and formula errors.  The hubs used to be skeptical of my math skills, even though I got a higher grade than him in calculus, but he's seen my budgeting skills when it comes to clothes. I can't do the advanced computations in my head that he can do in his, but that's why they make calculators (and back up calculators). 

My 9-5 job keeps my 9-5 clothes on the more conservative side. I try to get away with neon and spice when I came, but when I know I'm in meeting with people who have Ph.Ds and advanced degrees that put my little M.A. to shame I keep things very, very neutral. I mean, neutral separates with python print pumps :) 

How do you dress for work? Let the creative side run free or are you in a conservative field like me?

Tuesday, February 11, 2014

Kitchen Renovation: Backsplash

When the hubs and I made our kitchen plans we were a divided house when it came to the backsplash:
- he wanted to have our wonderful contractors install it and he wanted to have it done immediately;
- I wanted to try to install it ourselves and would be totally cool if we waited a few months to put it in.

Let the record show that the hubs won. I know, he's shocked as well.

Flash back to late December and everything was ordered for our kitchen except for the backsplash. It looked like I was going to win for once when I made the mistake of checking my phone the day after Christmas.  Sure enough, there was an email from The Tile Shop that they were having a massive end of year sale through the weekend. I don't know how often classic marble tile goes on sale, so seeing that we could get our materials for 20% off was the deciding factor. 

The hubs picked out a gorgeous meram carrara marble subway tile that was light enough, but not too white for our kitchen. We wanted something that was heavy on texture, gray, and not too polished looking so it would compliment our crazy granite.  Even when we were picking up our stone I joked that we could take a DIY class at The Tile Shop and figure this out on our own.  

Two things then happened: 
- the hubs pointed out that he put in the floors and that I had talked him into installing wood floors in our living room. I should stop pressing my luck. 
- we didn't own any of the tools needed to install the tile, let alone know how to work a wet saw. 

Then the sales associate asked where we were going to cut the tile in the cold weather. We looked a tad bit dumbfounded and said, "outside" because we don't have a garage. Turns out you can't exactly use a wet saw outside in 20 degree weather.  The real final kicker was when the hubs came home from work later the next week with his work schedule and we realized he wouldn't be home for a full weekend until mid-February.  The executive decision was made to have our contractors install the tile! 

And boy was it pretty coming home to that last week! Day 32 the weather got just over freezing and the tile was cut and installed! 


This is where the hubs joked that if he installed the tile it wouldn't have gone that close to our cabinets. I think he meant he wouldn't have cut the tile and it would have just ended at the last full tile. 

Day 33: I had a meeting, then a much needed happy hour, but the real party began when I got home and saw the kitchen like this: 


Dishwasher was in (and worked!) and the backsplash had been grouted. 


Lots of texture and veins in this marble and we love it. There are also slight copperish veins in quite a few of the pieces and they really help tie in our pendant lights. We went with a standard white grout. As much as I love gray I couldn't go with a darker grout because they look dirty to me. I know standard white isn't for everyone, but I'm weird and it's okay. My hubs is cool with it. 

And then the Jack and Gingers started flowing in the kitchen. Honestly, I don't even remember what we ate for dinner, but I do remember having a few beverages. We Face-timed with our families and showed them the kitchen before I posted more photos on Facebook. My sister was kind enough to call me out on my tipsy behavior.  Like two crazy poor adults the hubs and I spent the rest of our Wednesday night dancing around our kitchen (literally) and just amazed that it was finally here. 


We left the to-do lists for another day and just soaked it all in for a night.  We're not entirely done, we didn't get accomplished what we wanted to this weekend, but we're in a very happy place right now. So happy that I pushed "add to cart" on our living room floors and we spent our Saturday morning loading up the new floors and organizing the boards by color and length so we can install them this weekend. 


Later in the weekend the sunlight came out and we just continued to soak in our kitchen. We have a few paint touch-ups to do and we still need to paint the window frame, but other than that I think our kitchen is done, for now.  At some point we'll upgrade our basic outlet covers to fancy marble ones and we obviously need new furniture, but the major pieces are D-O-N-E! There's unpacking to do and I can't seem to find our toaster, but again we're not rushing it. 

Oh, this is NOT a sponsored post by The Tile Shop.  We actually fell in love with a marble tile when we were at the stone yard picking out our granite slab. From there we were able to hone our search and The Tile Shop had the best prices by far. Plus, we really liked that we could return a full box of tile, which we did, and didn't have to pay a restocking fee.  We still have a decent bit of tile leftover from another box and right now we plan to use that in one of our bathrooms as a accent piece. And I hope to install it myself at that point! 

Just a few more kitchen posts left, I promise! I'm going to show the final photos once it's actually finalized and I get a daylight day to take photos. I'm also going to do a source post so if you liked something you can track it down. And finally, the post I'm not looking forward to at all - how much this remodel cost. We haven't run the final numbers yet and I don't want to look at them just yet! 

Thursday, February 6, 2014

Kitchen Renovation: Paint Day


Day 23: Let's get some paint up on these walls already!  We started out bright and early in the morning and started in the kitchen with our first coat of paint. 

Paint: Mountain Air by Sherwin Williams. Initially we wanted to go with a gray paint, but after seeing how gray the granite truly was in our house and then knowing we had a gray back splash going in we decided to go with a light blue paint. Plus, the name was absolutely perfect as I grew up in the mountains. 

We bought two gallons from the Emerald line. We went with a satin finish since we were going to have paint in the kitchen and generally you don't want to use flat paint in a kitchen area. However, we didn't want go super shiny with a semi-gloss finish since this paint would be wrapping around seamlessly into our dining room and living room. That would have been a lot of shine! 

So far in our house we've painted three bedrooms, a bath room, and a man cave. We've used a different brand of paint in each room and when it was all said and done we really liked the coverage and color payoff of Sherwin Williams paint the best.  Yes, it's a bit pricier than a $20 gallon of paint you can buy at a big box store, but in the grand scheme of things paying more for paint isn't going to break your budget. Our biggest rationale was we were going to have three rooms in the same color and we wanted to make sure the paint looked like it was done by professional even if it wasn't. We're both in love with this paint formula and we probably won't stray from it when painting the remaining rooms in our house. Our walls aren't in the greatest of shape and the paint has amazing coverage, even for a light color, and this paint made everything look very smooth. 


And sure, the one time in his life the hubs picks up a camera I'm busting out to Lady Gaga. I tried to say it was the paint fumes, but then the hubs reminded me we picked a no VOC paint. Whoops! 


You know it's getting crazy in life when the jumbo soda comes out and there isn't even any Jack in it! 


We've realized that I'm better suited at cutting in and the hubs also is too tall for it!


We finished with the second coat around 4pm in the afternoon and the winter sun had already disappeared. And yes, that's our damaged dishwasher in the dining room.


The only downside to finishing up the paint on Sunday afternoon meant it wasn't until the following Saturday that the hubs and I saw the rooms in full daylight! The sun isn't up just yet when we leave for work in the morning and the sunlight is incredibly faded by time we get home at night. Thanks short winter days! 

We have just a few minor touch ups to take care of this weekend and then the painting is DONE.  We're also going to add a coat of high gloss paint to our window frame to ensure it repels any potential water back splash from the sink. 


In the interest of saving time, stress, and money we elected not to paint where our back splash is being installed. Or we're just lazy, the jury is still out on that one.

I know we could have had paid our contractors to paint for us and considering they're doing pretty much everything else it would have made sense. However, the hubs and I oddly like painting. Or at least we like the part of picking out a color. But it was nice that we were able to do something besides just the floors with this kitchen. 

Up next - the back splash.  Oh, and if you didn't see this then I can come clean and tell you the kitchen is now structurally finished! We've got a few touchups to do this weekend and obviously we need new furniture, but we're done with the big items. Even the dishwasher is working :)